Crest Whitening Strips: Mastering the Road to Brighter Smiles—Step-by-Step Instructions for Professional Results
Crest Whitening Strips: Mastering the Road to Brighter Smiles—Step-by-Step Instructions for Professional Results
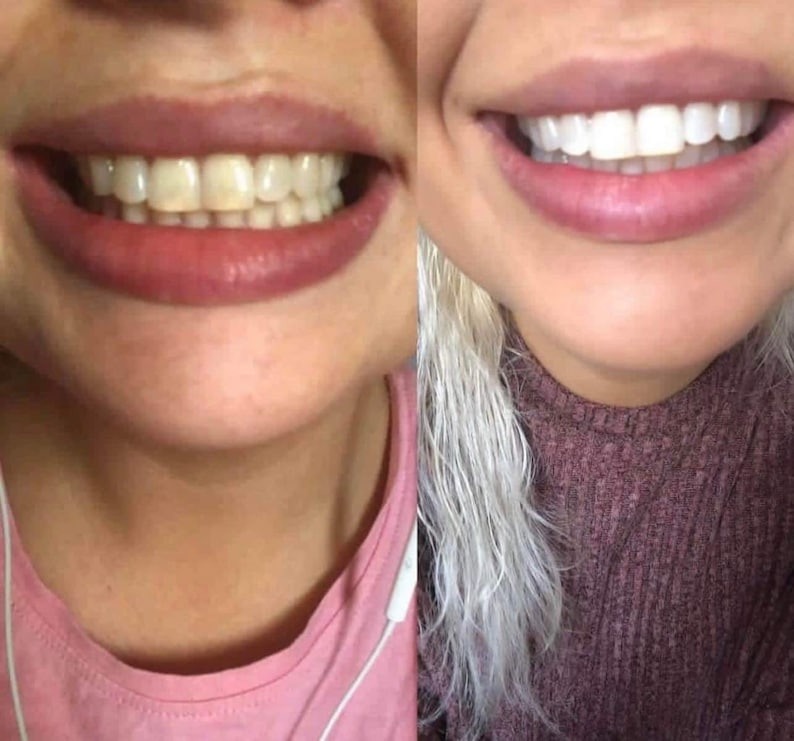
For those seeking visible, long-lasting tooth whitening with minimal effort, Crest Whitening Strips offer a compelling solution—backed by science, simplicity, and clinical validation. When used correctly, these pre-assembled adhesive strips deliver noticeable color Correction in as little as two weeks, transforming stained, yellowed, or aging teeth into a radiant, youthful appearance. Central to unlocking their full potential are clear, precise application instructions that guide users from initial setup to final removal, ensuring optimal results without compromise.
This article dissects the essential steps and best practices for using Crest Whitening Strips—turning everyday use into a calculated path toward a more confident smile.
At the heart of the Crest Whitening Strips system is a dual-adhesive strip design: one side bonds securely to the front surface of teeth, while the other releases a patented whitening gel containing hydrogen peroxide at a controlled, safe concentration. This advanced formulation targets extrinsic stains from coffee, tea, wine, tobacco, and daily diet while minimizing sensitivity through gentle ingredient selection and non-abrasive resin carriers.
The strips are engineered for precision—each piece fits standard adult dentition with minimal padding, ensuring consistent contact across enamel surfaces without excessive overlap or gaps that could reduce effectiveness.
Preparation: Setting the Stage for Success
Before applying Crest Whitening Strips, thorough oral preparation is crucial. Saliva, plaque, or matrix residues on teeth can block the gel’s penetration, reducing whitening efficiency. Begin by brushing teeth gently with fluoride toothpaste to remove surface debris.
Rinse freely but avoid mouthwash immediately before use—alcohol-based rinses can dehydrate enamel and increase sensitivity risk. For best adhesion, ensure teeth are dry; use a clean, soft cloth to dry enamel and especially around gums and switching lines. If flossing is done daily, remove any tangled floss from between teeth—strips cannot adhere properly over foreign particles.
Furthermore, fleeing or acidic foods 30 minutes prior helps stabilize enamel pH, reducing the chance of temporary hypersensitivity during treatment.
p>Choosing the right moment to start is equally vital—many users see fastest results when beginning whitening after a broadband cleaning or between dental checkups, when enamel is at its healthiest and most receptive. Whether at home or during professional application at a dental office, following the product’s designated timeline—typically 30 minutes per strip, twice daily—ensures maximum whitening without overuse.
The Critical Application Process
Using Crest Whitening Strips is intentionally simple, designed for accessibility without sacrificing precision. Follow these proven steps:
- Step One: Open strip with care—peak the tab for exposure and check for damage.
Inspect for tears or discoloration; discard if compromised to preserve effectiveness.
- Step Two: Remove backing, place strip horizontally over clean, dry teeth, aligning the adhesive edge snugly to the outer surfaces (premolars, canines, incisors). Press firmly from the center outward to eliminate air bubbles and secure full contact with enamel.
- Step Three: Adjust positioning using small fingers—ensure edges lie flat against tooth margins. Avoid overextension into gingival spaces, which can cause irritation.
Proper fit ensures even gel distribution


Related Post

Let Them Thrive: The Revolutionary Psychology Behind The Let Them Theory PDF Free Download

Is Roblox A Good Game? Unpacking the Pros and Cons of the Phenomenal Universe

Fixing Your Laptop Screen: A Simple, Step-by-Step Guide to Quick Recovery

Why Td Banks Houston Is the Unsung Financial Engine of Texas’s Energy Capital